For many aspiring crocheters, the magic ring technique remains shrouded in mystery. The quest to begin a project in the round often leads to frustration and confusion. However, fear not! In this beginner’s guide, we’ll demystify the magic ring, providing clear and concise instructions to help you master this essential crochet skill.
Picture this: You’re eager to start a new crochet project, perhaps a cozy amigurumi creature or a vibrant mandala. You’ve gathered your materials, selected your yarn, and eagerly picked up your crochet hook. But as you begin, you’re confronted with a perplexing problem: How do you create a neat and secure foundation for your work in the round? Enter the magic ring.
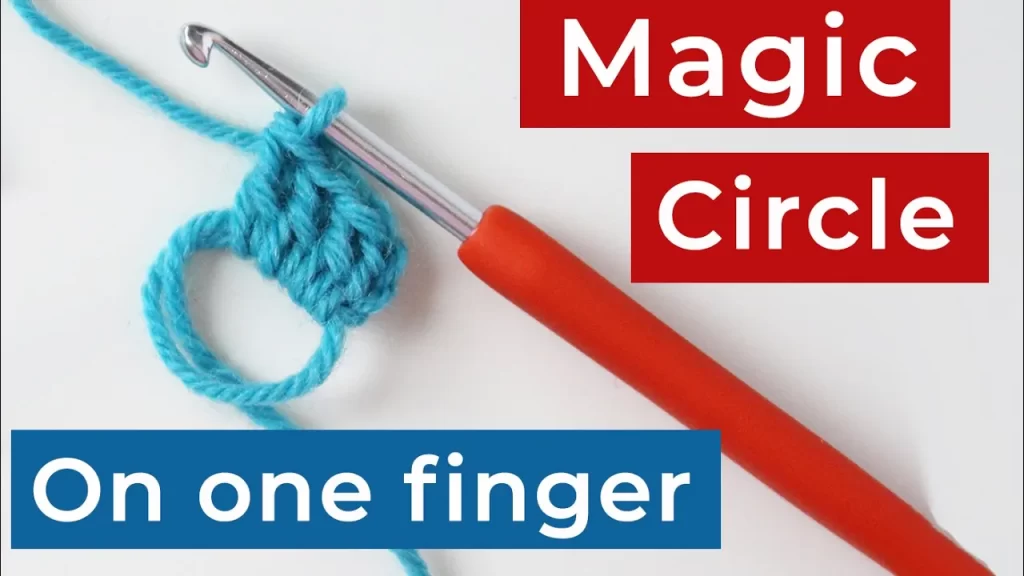
What is a Magic Ring?
Also known as a magic circle or magic loop, the magic ring is a clever technique used to initiate crocheted projects worked in the round. It provides a seamless and adjustable starting point, allowing you to control the size of the center hole with ease. From amigurumi toys to intricate doilies, the magic ring is a versatile tool that every crocheter should master.
Mastering the Magic Ring
Now that we understand the importance of the magic ring let’s delve into the steps to create one. We’ll break down the process into simple, easy-to-follow instructions, ensuring that even beginners can conquer this crochet conundrum.
Step-by-Step Tutorial to Make a Magic Ring in Crochet
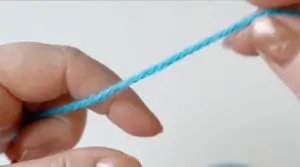
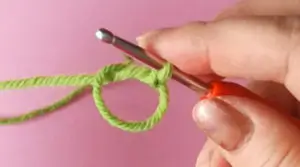
Hold Your Yarn Securely: Begin by holding the yarn end with your left hand fingers, ensuring a firm grip.
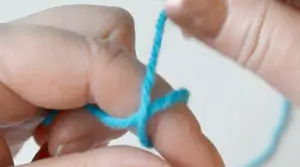
Wrap Yarn Around Index Finger: Take the yarn and wrap it around your index finger once in a clockwise direction.
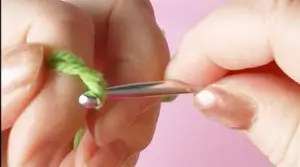
Insert Hook Under Yarn: With your crochet hook, pass it under the yarn loop on your finger, then catch the yarn and pull it through to form a loop on the hook.

Chain 1: Make a chain stitch by yarning over and pulling the yarn through the loop on the hook. This creates a secure starting point for your crocheting.
Remove Loop from Finger: Slide the loop off your index finger, ensuring it remains intact on the hook.
Crochet First Round: Work your first round of crochet stitches directly into the loop on the hook, following the pattern instructions.
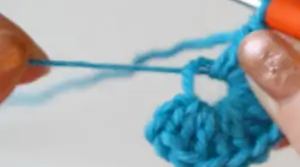
Tighten the Loop: Once you’ve completed the first round, gently pull the yarn end to tighten the magic ring as much as desired, closing the center hole.
Secure and Trim Yarn: Weave in the yarn end securely with a yarn needle, then cut off any excess yarn.
Now you Know How to Make A Magic Ring
With these straightforward steps, you’ve mastered the art of creating a magic ring in crochet. Say goodbye to frustration and hello to boundless creativity as you embark on your crocheting journey. Remember, practice makes perfect, so don’t be discouraged if it takes a few attempts to get it just right. Embrace the magic of the magic ring and let your imagination soar!